Windows Testing Machine
For cross-browser testing, we’re using BrowserStack, however sometimes, you want to test something on a real machine that is not a Mac, so you can evaluate animation performance better and debug weird issues more directly.
Specifications
- Toshiba Satellite Pro A50-D-10X
- OS: Windows 10 Pro 64-bit – Version 1809
- Processor: Intel Core i5-7200U
- Memory: 8.192 of 2.133MHz DDR4 RAM
- Graphics: Intel HD Graphics 620
- Storage: Solid State Disk 256 GB
- Wireless: Intel Dual Band Wireless-AC 8265 / 802.11ac+agn / Bluetooth 4.2
- 1 × External Headphone / Microphone Combo Socket
- 1 × HDMI-out supporting 1080p signal format
- 1 × RGB
- 1 × RJ-45
- 1 × SD Cardreader (SD, SDHC, SDXC supports UHS-I, MMC)
- 2 × USB 2.0
- 2 × USB 3.0
Microsoft Remote Desktop
For intense debugging sessions, it might be convenient to control the laptop from your computer. That’s where Microsoft Remote Desktop comes in handy.
Installation
You can choose from the following methods:
Direct Download
Stable Release – Mac AppStore
Beta Build – HockeyApp
Homebrew
brew cask install microsoft-remote-desktop-beta
Configuration
- Start the Remote Desktop Client for Mac
- Open Preferences and go to User Accounts
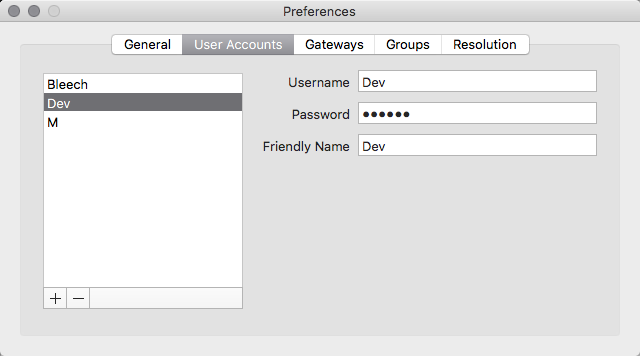
- Add a New Account with credentials from LastPass
- Switch to Resolution Tab

- Add the Resolution of your display
- Close Preferences
- Press “+” in the main toolbar and add a “New Desktop”

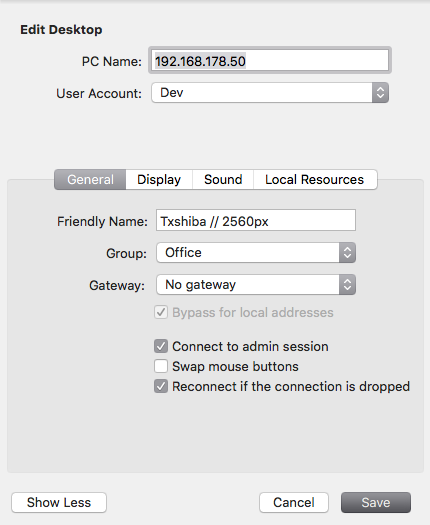
- In “Edit Desktop” use these settings:
- PC Name: 192.168.178.50
- Select the User Account: Dev
- Friendly Name (General): Toshiba
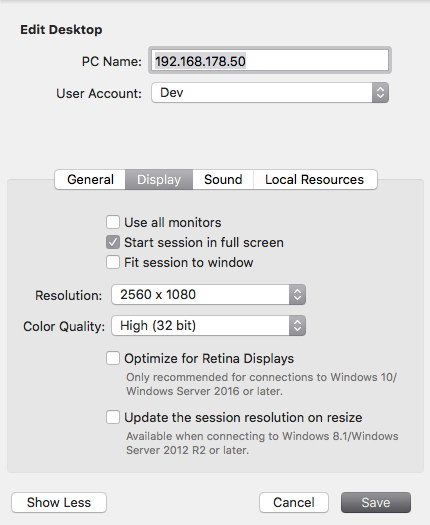
- Select a Resolution (Display)
- Check “Start session in full screen” (Display)
- Check “Clipboard” (Local Resources)


- Save “Edit Desktop” and go to main application
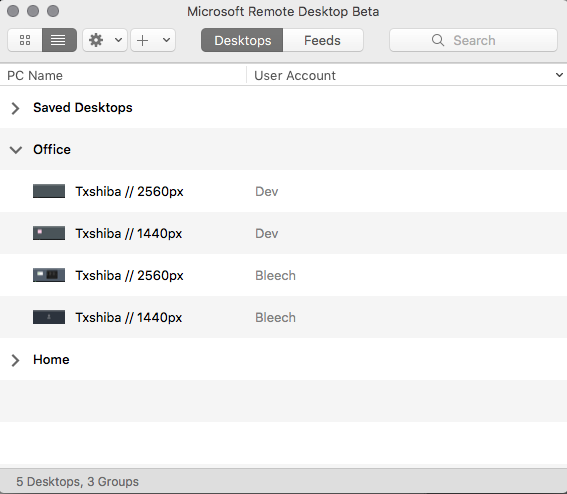
- Back in the main app choose a desktop from the list
- Double click to connect
- It will ask to accept a certificate..
- Select “Always Trust” to deal with this just once
- The connection should be successfully established